SpringShell Detection/Remediation

How do we best detect the SpringShell vulnerabilty(CVE-2022-22965)?

Microsoft created a nice blog on the vulnerability here listing remediations and detection methods: https://www.microsoft.com/security/blog/2022/04/04/springshell-rce-vulnerability-guidance-for-protecting-against-and-detecting-cve-2022-22965/

Using this information and those of your Vulnerabiilty scanners we can start to discover legitimately vulnerable systems. There’s unfortunately a lot of false positives and so we might employ several tools which I’ll list here.

  1. To scan a suspect server for known suspect files there is this tool from qualys that scans Windows machines https://github.com/Qualys/spring4scanwin
  2. Nmap NSE script https://github.com/gpiechnik2/nmap-spring4shell
  3. Powershell script I created. It takes a csv file with an “Address” field that includes IP addresses to scan, using the known detection method as described in the MS report and others:
curl host:port/path?class.module.classLoader.URLs%5B0%5D=0

I use this scan external hosts for ports 80 and 443. You can modify this for your own use looking for a 400 http response. Also make sure to modify the export path so you can have a nice report of the hosts and their results.

Remediation/Mitigation

If you detect the vulnerable hosts you will need to apply patches for the spring framework or work with vendors to make sure apps are upgraded.

Spring Framework fixed releases:

  • 5.3.18+
  • 5.2.20+

Expanding a VMware VM OS disk in Ubuntu 20 with Workstation 16

  1. The VM needs to be powered off
  2. Back up your VM to usb drive or otherwise
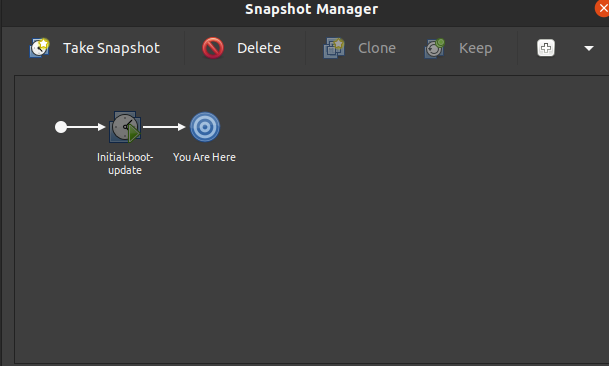
  3. Delete the snapshots associated to the VM
  4. Expand the drive(make sure you have space on the host)
  5. Resize the drive within the Ubuntu vm in this case
Deleting snapshots within workstation 16 Snapshot manager for the VM

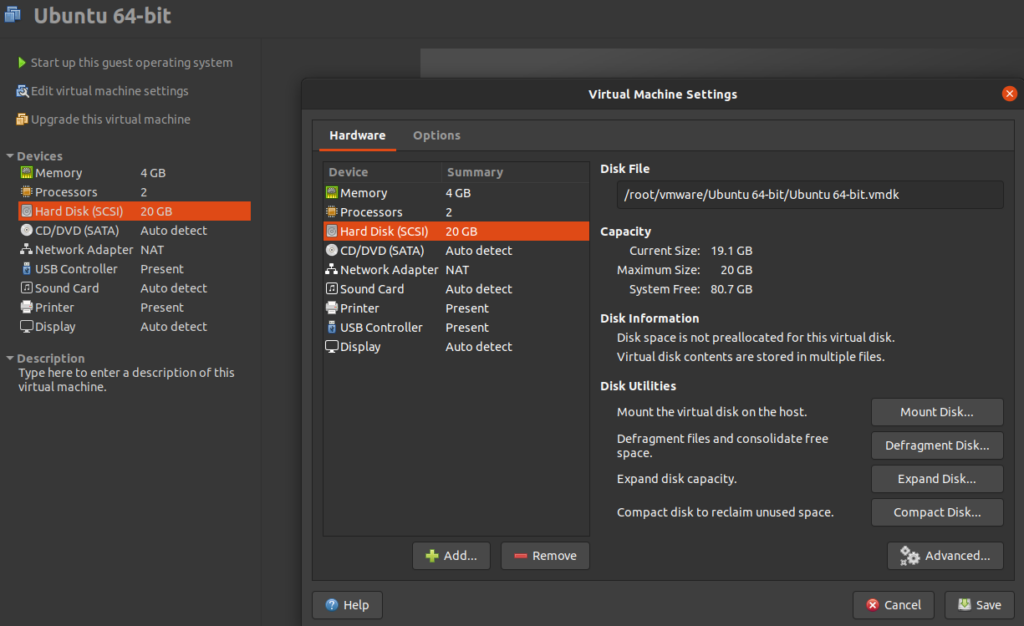
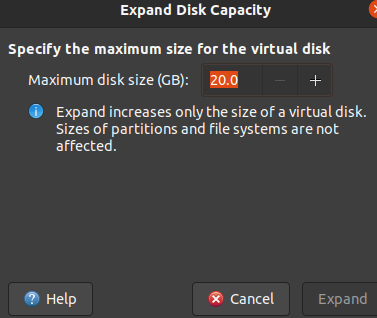
Expanding the drive
Once expanded to the size needed save the config and you will need to repartition the drive within the VM to make the space available

Confirm the disk your expanding by running the command lsblk

“lsblk” command shows the 40G disk expanded from 20G. We currently see the “sda5” partition as the largest visible and working used space along with the other sda* partitions.

Resizing the partition

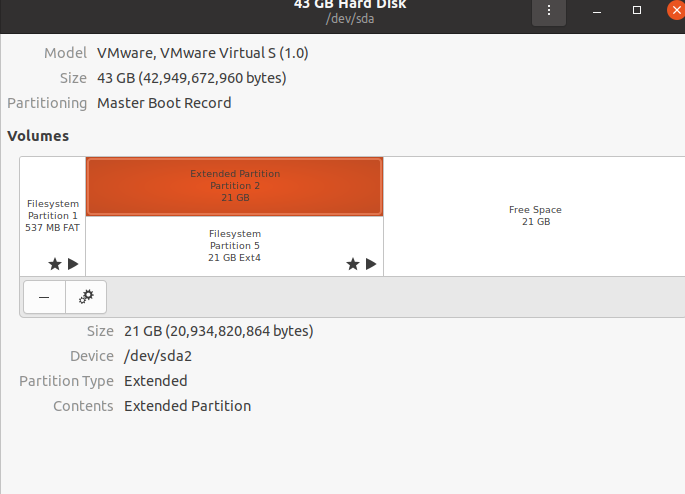
Using the Disks tool(in Ubuntu 20 > Activities >Search > Disks) I had to resize both the Extended and Filesystem partitions. First the Extended partition then the Filesystem. BACKUP!! before doing this. You can resize by clicking the gear icon then choosing “Resize” drag the slider as far as you want to eat into the Free space.
After resizing you have the fully expanding disk in use by your filesystem.

On-Prem AD vs AzureAD Password policy usage

For hybrid environments if you need to find out what password policy is officially being used there are few guidelines to keep abreast of.

If your user accounts are synchronized using Azure AD connect they will be using the on-premises AD policy

Use this command to check the policy from the on-prem AD
Get-ADDefaultDomainPasswordPolicy -Identity <YourDomain.com>

AzureAD policies apply when user accounts that are created and managed directly in Azure AD.

The following information is pulled from this guide directly from MS.

AzureAD Password Policies
PropertyRequirements
Characters allowedA – Z a – z 0 – 9 @ # $ % ^ & * – _ ! + = [ ] { } | \ : ‘ , . ? / ` ~ ” ( ) ; blank space
Characters not allowedUnicode characters.
Password restrictionsA minimum of 8 characters and a maximum of 256 characters. Requires three out of four of the following: Lowercase characters. Uppercase characters. Numbers (0-9). Symbols (see the previous password restrictions).
Password expiry duration (Maximum password age)Default value: 90 days. The value is configurable by using the Set-MsolPasswordPolicy cmdlet from the Azure Active Directory Module for Windows PowerShell.
Password expiry notification (When users are notified of password expiration)Default value: 14 days (before password expires). The value is configurable by using the Set-MsolPasswordPolicy cmdlet.
Password expiry (Let passwords never expire)Default value: false (indicates that password’s have an expiration date). The value can be configured for individual user accounts by using the Set-MsolUser cmdlet.
Password change historyThe last password can’t be used again when the user changes a password.
Password reset historyThe last password can be used again when the user resets a forgotten password.
Account lockoutAfter 10 unsuccessful sign-in attempts with the wrong password, the user is locked out for one minute. Further incorrect sign-in attempts lock out the user for increasing durations of time. Smart lockout [docs.microsoft.com] tracks the last three bad password hashes to avoid incrementing the lockout counter for the same password. If someone enters the same bad password multiple times, this behavior will not cause the account to lock out.

It’s important to note that some settings can’t be modified if your user accounts are exclusively managed within AzureAD.

SOAR Product Research

From an engineers perspective Security Orchestration,Automation and Response(SOAR) products are incredibly enticing in that they offer the ability to automate technical aspects of your day to day work but also streamline the process involved in the decision making and triage.

API integrations:

A very appealing piece about SOAR products is that they offer API integration for which you can use to automate responses to alerts or use for alert enrichment. A lot of times I might have to connect to an API, perform the logic and get into the code so to speak in order to make something happen. The ultimate promise with SOAR is we don’t have to do this. A no code/programming experience.

Most vendors provide a list of integrations they have. Although this doesn’t exactly list out what capabilities it has it is good to know that the vendor has been developing integrations for your organizations particular product suite or covers most of it. Some vendors might not have as many capabilities or lean on community developed extensions.

Use Cases:

  • Automated Phishing investigations from alerts to purges
  • Enhance alert investigations by providing additional context data that would be manually done by a SOC analyst
  • Automate threat hunting cases by pulling data from all your disparate tools
  • Automate IOC lookups in Threat intel platforms like VirusTotal or Talo Intel
  • Automate user permissions validation and account disables
  • Automate Provisioning/Deprovisiong beyond just your Active Directory environment ie;your payroll app too
  • Automate the Malware incident response steps: Identify,investigate,Contain and remove

Chat-bot Operations:

Some of the vendors offer a chat operation to send alerts that bubble up to your team via either Microsoft’s Teams or something like a Slack group chat.

Integration lists from different SOAR vendors

Resources:

https://www.rapid7.com/info/security-orchestration-and-automation-playbook/

https://techcommunity.microsoft.com/t5/Security-Privacy-and-Compliance/Introducing-new-code-free-options-to-connect-with-Microsoft/ba-p/328730

Penetration Testing for OSCP – Guide 2

The guide touches on searching for exploits,getting/using reverse shells, escalating for Administrator accounts on Windows/Root for Linux, pivoting across networks, Attacking a windows domain, password cracking techniques, exploit testing, post root/admin actions and more.

Please follow the entire guide on my GitHub account(see link below). I can more readily and easily display Markdown files which make for a much easier conversion from my Jupyter Notebooks where I build most of my documentation.

https://github.com/DevilSquidSecOps/PentesterOps/blob/master/pentester_guide2_Shells-PrivEsc-Pivoting.md

Automated .ps1 scripts with Task Scheduler

Action Options to run a script in Task Scheduler.

  • Program/Script: Scripts%SystemRoot%\system32\WindowsPowerShell\v1.0\powershell.exe
  • Arguments: -File .\Copy-Jobs_SB.ps1
  • Start in(path): C:\Anaconda3\Notebooks\MyScriptsTEST

Schedule Setup

Pretty simple outline in the gui. Use the “run now” buttons to verify they will actually work though when ran on a schedule.

Use Secure Strings to at least hide the plain text passwords or keys you use in your scripts. Remember that you must generate a Secure String with the account you will be using.

Also make sure to automate these scripts from a secured server. No one should be able to easily connect and read these other than yourself of the security team.

Troubleshooting non-working scripts

Trouble Shooting a service account issue. For instance you originally used an account you tested with(like your personal user admin account etc)

Use a Try/Catch block in your ps1 script in the case you can’t tell if it’s something getting caught up while Task Scheduler runs the script. This happened to me when configuring a service account for production to run the script that I had originally tested with my user account. After verifying the script ran I found out it was getting caught up in the translation of a Secure String I created with my user account. These Secure Strings need to be generated by the account that runs the script.

Try {  

<DO SOMETHING>

}
#ASSIGN VARIABLES TO THE BUILT IN EXCEPTION RESULTS PRINT THEM TO A LOG
Catch {
$ErrorMessage = $_.Exception.Message
$FailedItem = $_.Exception.ItemName
$hrresult = $_.Exception.HResult
$stacktrace = $_.Exception.StackTrace
Add-Content c:\temp\log.txt "second error message was: $ErrorMessage Failed Item was: $FailedItem `nstacktrace was: $stacktrace $hrresult"
}


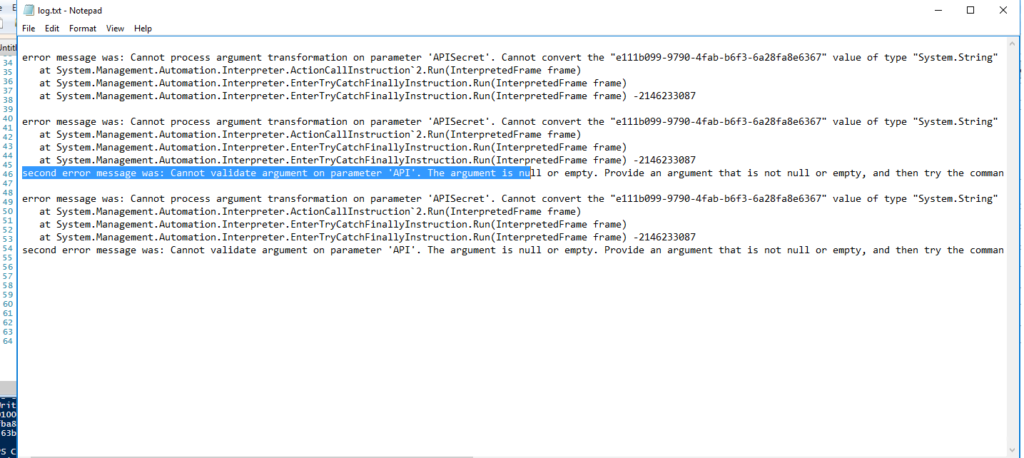
Below is an example of exceptions logged that deduced my issues to the Secure String used.

Future Improvements:

  • Run automated scripts using an MSA account

Finding a Microsoft KB in a Cumulative Update

• Windows patches linked to Knowledge Base articles or MS bulletins roll up and become unavailable as a hot-fix/single update file and go into a cumulative update. This can pose an issue when your Deployment system like SCCM or BigFix no longer have the update to push to machines since they follow Microsoft’s patch catalog for which old updates get rolled up and removed. This can become an issue when your trying to force patch machines that may become vulnerable to malware that the patch can fix and you can’t readily find what patch to use since the KB originally able to fix a vulnerability is now no longer available for single update.
• Although keeping all machines up to date is best practice it can become an issue when legacy applications begin to break and when if settings allow users to delay updates it’s likely a population of un-patched machines will arise.
• Windows 10 patches are normally fixed in new versions so updating works but if you want to see if you can find a KB or MSXX-xxxx bulletin you can search the known cumulative updates
Find your Security Vulnerability Builletin:
MS17-010 – google search and go to the MS site https://docs.microsoft.com/en-us/security-updates/securitybulletins/2017/ms17-010 Follow it to the KB used to install on Win10 1511 x64 machines https://support.microsoft.com/eu-es/help/4013389/title you’ll find the install instructions provide KB4013198 as actual file needed.
Search for this in the MS update catalog. But you’ll have to do it by Cumulative update since this is older and rolled up.
• Go to: http://www.catalog.update.microsoft.com
o Search for “windows 10 version 1511” filter by last updated
o Look for latest cumulative update for the version and arch.
o Search for the KB installer “KB4013198” under the “Update Details” > “Package Details” using ctrl+F for quick finds


Finding the Cumulative update in BigFix so you can install it on machines.
Go to:

https://YourBesServer.domain.com > log in > Apps > Patch > use the KB patch name for the Cumulative update you found “KB4093109”


From here you can see that it is available and you can deploy it to vulnerable machines to patch for the SMB exploits.

Installing MDT 2013 for a Windows 10 2016 LTSB Deployment

Video: https://youtu.be/uuFih16LOc4


WINDOWS 10 DEPLOYMENT REQUIREMENTS FOR MDT AND UPGRADING FROM OLDER VERSIONS


MDT:

Req: (MDT) 2013 Update 2 (6.3.8330) Version 8443 is needed to support the 1607 build of Win 10 which is used for LTSB 2016


Upgrading: MDT 2012 needs to become MDT2013 (An in place install can be done to upgrade after the ADK version is installed)

install: https://www.microsoft.com/en-us/download/details.aspx?id=54259


ADK:

Req: ADK for Windows 10

Install: https://developer.microsoft.com/en-us/windows/hardware/windows-assessment-deployment-kit

If ADK for Windows 8.1 or older is installed(Uninstall first)


For LTSB 2016 Edition of Win 10 you will need the ADK for that version known as ADK for Version 1607


CHECKING YOUR WINDOWS 10 VERSIONS

https://technet.microsoft.com/en-us/windows/release-info

-use the cmd > set command and at the top it’ll tell you your build compare it to the chart in above link

The Cerber File Encrypting Virus

Screen Shots:

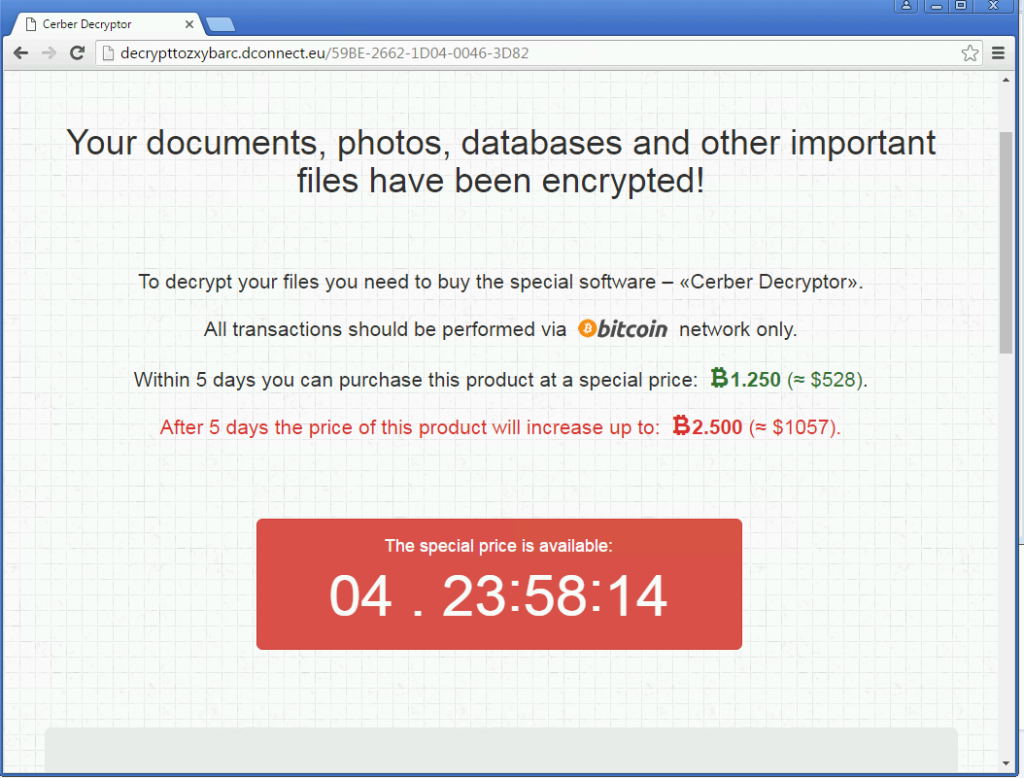
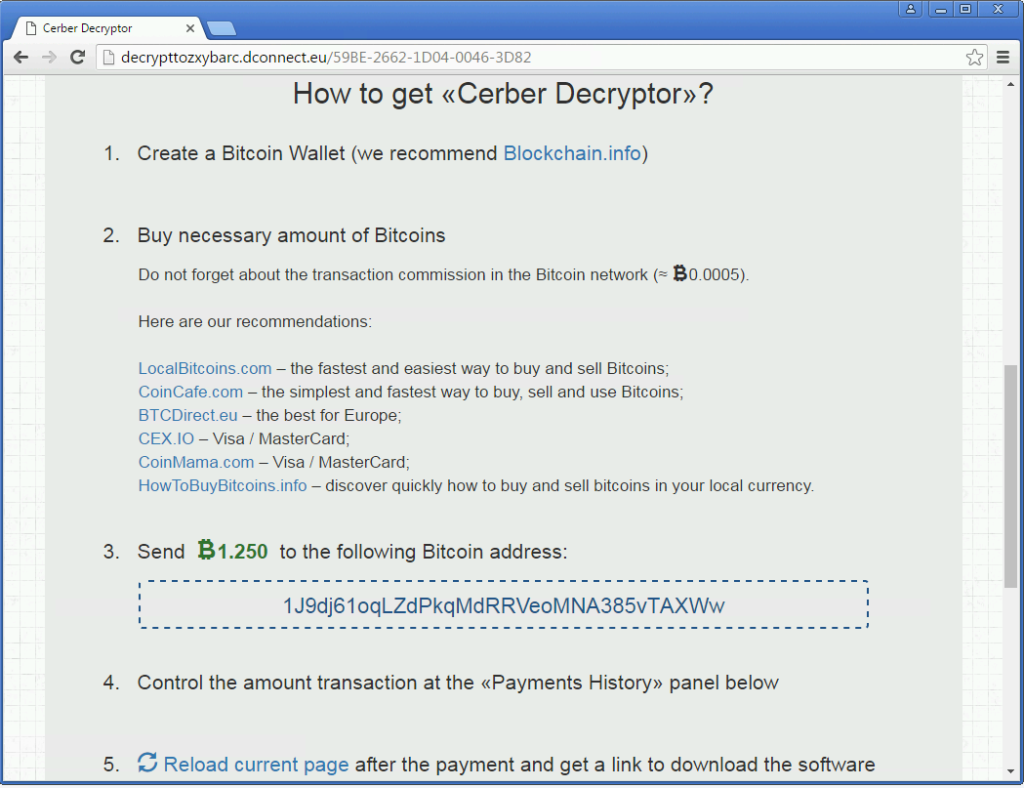
CerberRansom
CerberRansom1Ran into this bad boy today. I was reviewing the code from the github dump i found  here: https://gist.github.com/hasherezade/628928248e8e6c8dae04#file-config-json-L453

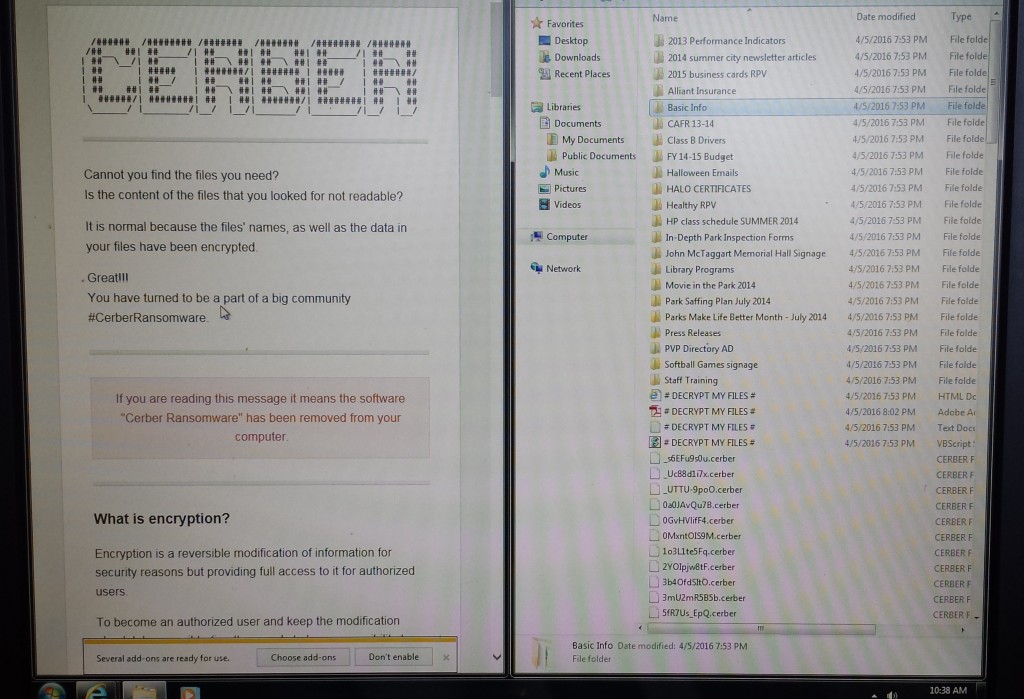
I was concerned that it worked on also infecting file shares but from what I can see it doesn’t touch them. After having a user infect a computer here in our Network it looks like nothing else has been touched but all the files on her computer displaying messages like this:

Cerber Virus

Every file basically encrypted until you pay the son of aguns.

Basic Steps on handling this type of problem:

  1. Verify none of your other networked file shares have been infected and run a full virus scan of the shares just to be safe. So far I haven’t heard of Cerber jumping to any networked shares so it keeps things local to the machine which means it is mainly targeting end users. Here is a snip of Code from the above link that leads me to believe it is only keeping things local since it’s the only reference to any directories it makes:                         “folders”: [
    “:\\$recycle.bin\\”,”: \\$windows.~bt\\”,
    “:\\boot\\”,”: \\drivers\\”,
    “:\\program files\\”,”: \\program files (x86)\\”,
    “:\\programdata\\”,”: \\users\\all users\\”,
    “:\\windows\\”,”\\appdata\\local\\”,
    “\\appdata\\locallow\\”,”\\appdata\\roaming\\”,
    “\\public\\music\\sample music\\”,”\\public\\pictures\\sample pictures\\”,
    “\\public\\videos\\sample videos\\”,”\\tor browser\\
  2. Next step is to Burn the infected machine(Just re-image it) Users might ask for the files in which case they can pay the ransom if it’s that important. Something like 2 bit coins or $500 if you pay up before it doubles on you every week. One other thing users have asked me is if they can at least see the files they lost in which case your going to be taking a picture of the computer screen because there’s no safe bets I would take making any kind of digital bridge to that computer(ie: plugging in a usb stick or taking a snapshot to transfer to a usb Stick)
  3. Final step is replace the users PC and restore their files. That is if you back them up!

UPDATE:

Confirmed with Talos Security group that this is not de-cryptable as of yet

Distribute Adobe Creative Cloud Package with SCCM 2012 With Device License

So if you have had to ever do this you will first have to deal with the legal side of the software. With adobe you can order a Device or User license.

User licences are the easiest to deal with because you don’t really manage it other than give a user the license.

With a device license however we need to specifically create a package using Adobe’s Creative Cloud Packager by which we end up downloading the software we want ie: Premier,Photoshop,etc. And then we can create an MSI file from that to distribute in SCCM 2012.

So check it out I have a video for this:)

-Sorry for the Blurred parts, for security purposes

-If there are questions, post in the comments and I’ll reply.

  1. Download Creative Cloud Packager to local HD
  2. Run CC Packager and select the Option to create a package for Teams and Educational licenses(Otherwise you won’t get the Device License Option)
  3. Use the program to download and create a package of the Adobe programs you want
  4. Import it into SCCM as an application
  5. Distribute to your Device Collection as needed. The applications should afterwards run without requiring the device to sign into the Cloud